Virtualmin panel listens on the port 10000 by default, to access the panel you should visit:
https://YOUR-SERVER-IP-ADDRESS:10000/
you can login with the username root and the root password that has been sent to your email address in the VPS information email.
If you are a cpanel user and are not familiar with Virtualmin, you should read this introduction article.
Virtualmin Video tutorials are available on youtube:
You need to configure Virtualmin on first login, please see the following article:
How to configure Virtualmin on first login
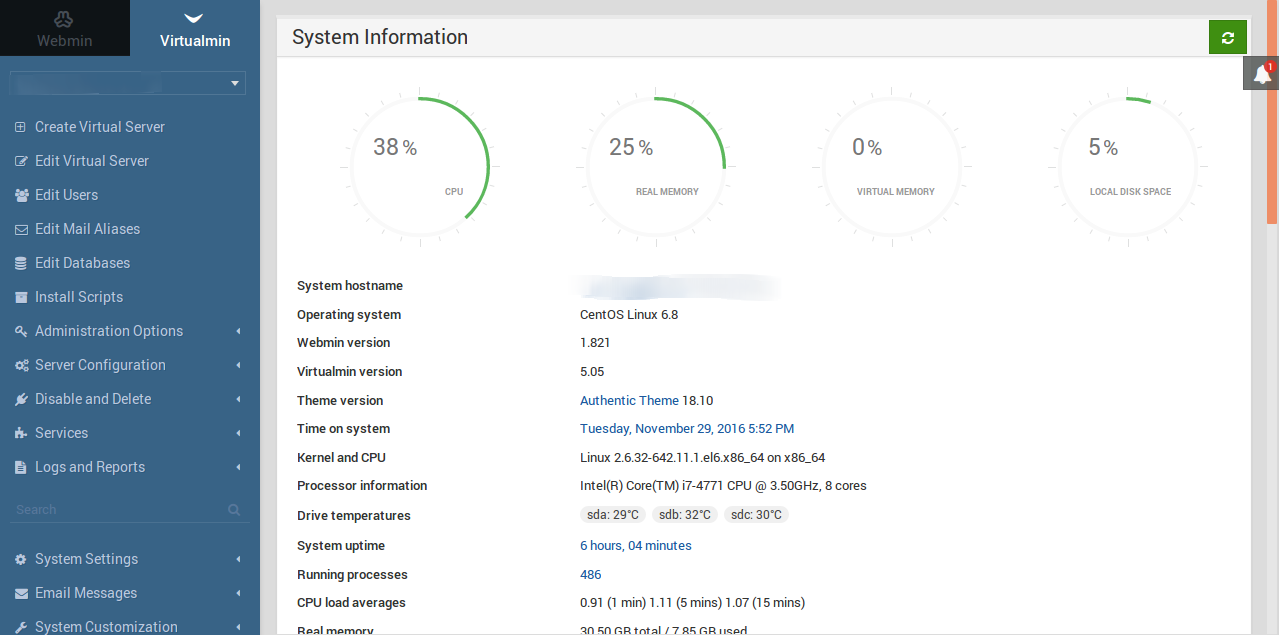
After you've configured your Virtualmin, you'll see the following page when you login to your panel:

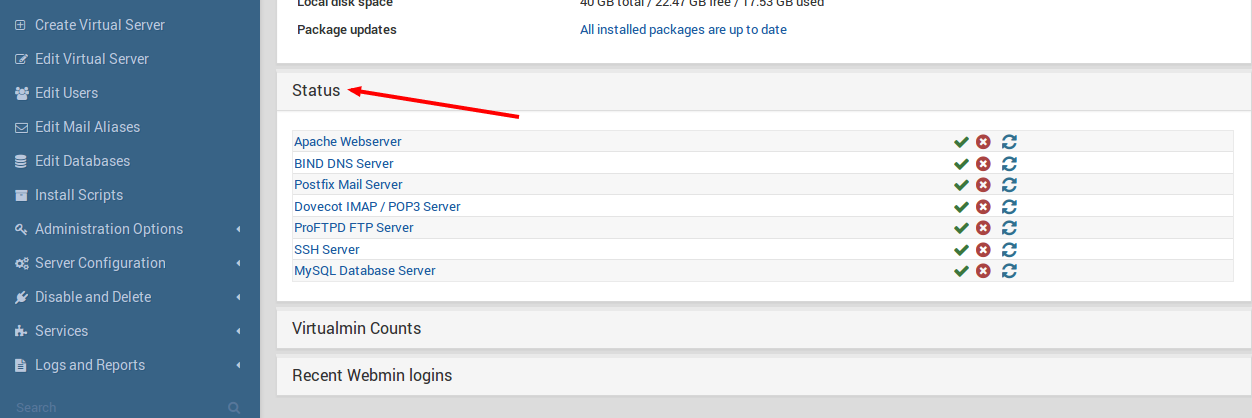
You can see the status services running on your VPS in the Status section of the default page:

As you see in the top left side of the panel there are two options: Webmin and Virtualmin.
Webmin is for managing the general configuration of your VPS/Dedicated server, here are some of the parts of the webmin panel that you might want to use them:
Managing Files: Webmin -> Others -> File Manager
Enabling/Disabling/Stopping/Starting Startup and Current services : Webmin -> System -> Bootup and Shutdown
Managing Cronjobs: Webmin -> System -> Scheduled Cronjobs
Updating your server: Webmin -> System -> Software package updates
Managing mysql databases: Webmin -> System -> Mysql database server
Viewing in queue mails : Webmin -> System -> Postfix mail server -> User mailboxes
Issuing a free SSL certificate for your virtualmin panel https://YOUR-SERVER-IP-ADDRESS:10000/ : Webmin -> Configuration -> SSL Encryption -> Lets Encrypt
Updating hostname: Webmin -> Networking -> Network Configuration -> Hostname and DNS client
Virtualmin is for managing websites hosted on your server. By using virtualmin, you can add / remove domains, subdomains, databases, email accounts, ... to your server. You'll see the word Virtual server a lot in this panel which means a hosting account in virtualmin terminology.
To add a new domain to your server: use Virtualmin -> Create new virtual server, enter your domain without www in the Domain name section of the page.
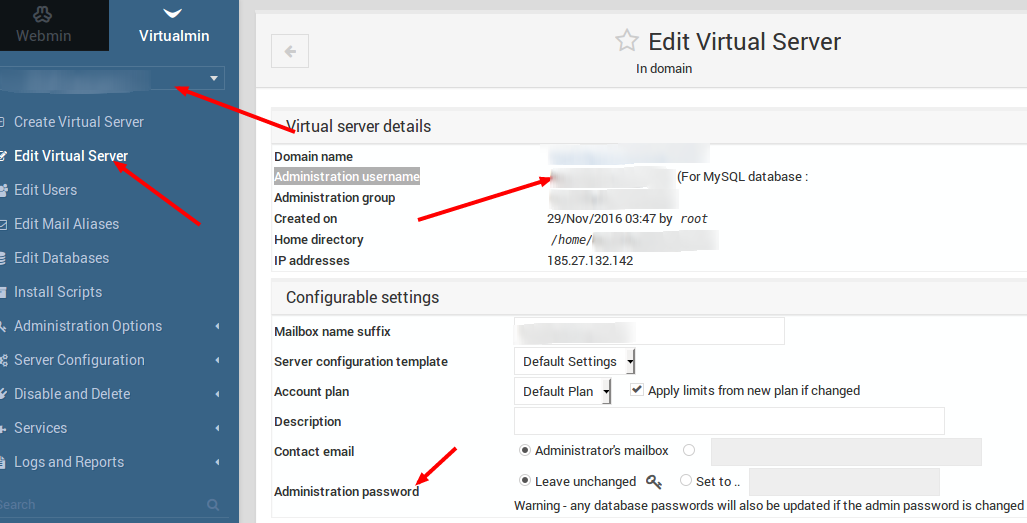
a new virtual server will be created and you'll see it in the left side of the Virtualmin panel in the list. Select the virtual server from the list -> Edit virtual server:

You can see your username in the Administrator username here. You can also update your password in this page. With this username and password you can login to your FTP server or connect to your mysql databases associated with this virtual server.
Here are some other parts of the virtualmin panel you might find it useful:
To create new databases: Virtualmin -> Select virtual server from the list -> Edit databases
To create a new email account: Virtualmin -> Select virtual server from the list -> Edit Users
To issue a FREE Lets Encrypt SSL certificate: Virtualmin -> Select virtual server from the list -> Server Configuration -> Manage SSL Certificates -> Let's Encrypt, set Months between automatic renewal to 2 and click on Request Certificate
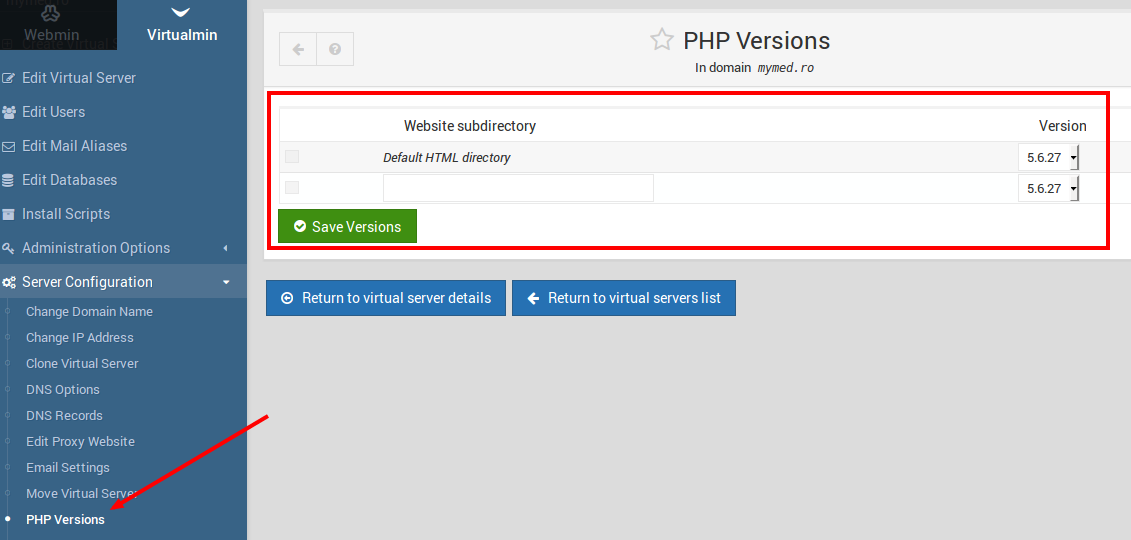
To select default PHP Version (5.3, 5.4, 5.5, 5.6, 7.0, 7.1, ...) for a virtual server or a specific folder: Virtualmin -> Select virtual server from the list -> Server Configuration -> PHP Versions
